How To Integrate Yeastar P-Series Cloud Edition PBX With Microsoft Teams
This guide explains how Yeastar P-Series Cloud Edition PBX users can integrate their system with Microsoft Teams.
To set up the integration, each user must install the Yeastar Linkus for Teams add-on on their Teams client. Once installed, users can log in using either their Yeastar extension account or their Microsoft account. After the integration is complete, Teams users will be able to make, receive, and manage calls directly from Microsoft Teams.
Step 1: Install ''Yeastar Linkus for Teams'' on Microsoft Teams
1. Open Microsoft Teams and log in.2. In the left sidebar, click on Apps.3. Search for Yeastar Linkus.
3. In the Apps section, select Yeastar Linkus and click Add.This will redirect you to a tab where you can access the Linkus Web Client and log in.
Step 2: Access Linkus Web Client In Microsoft Teams

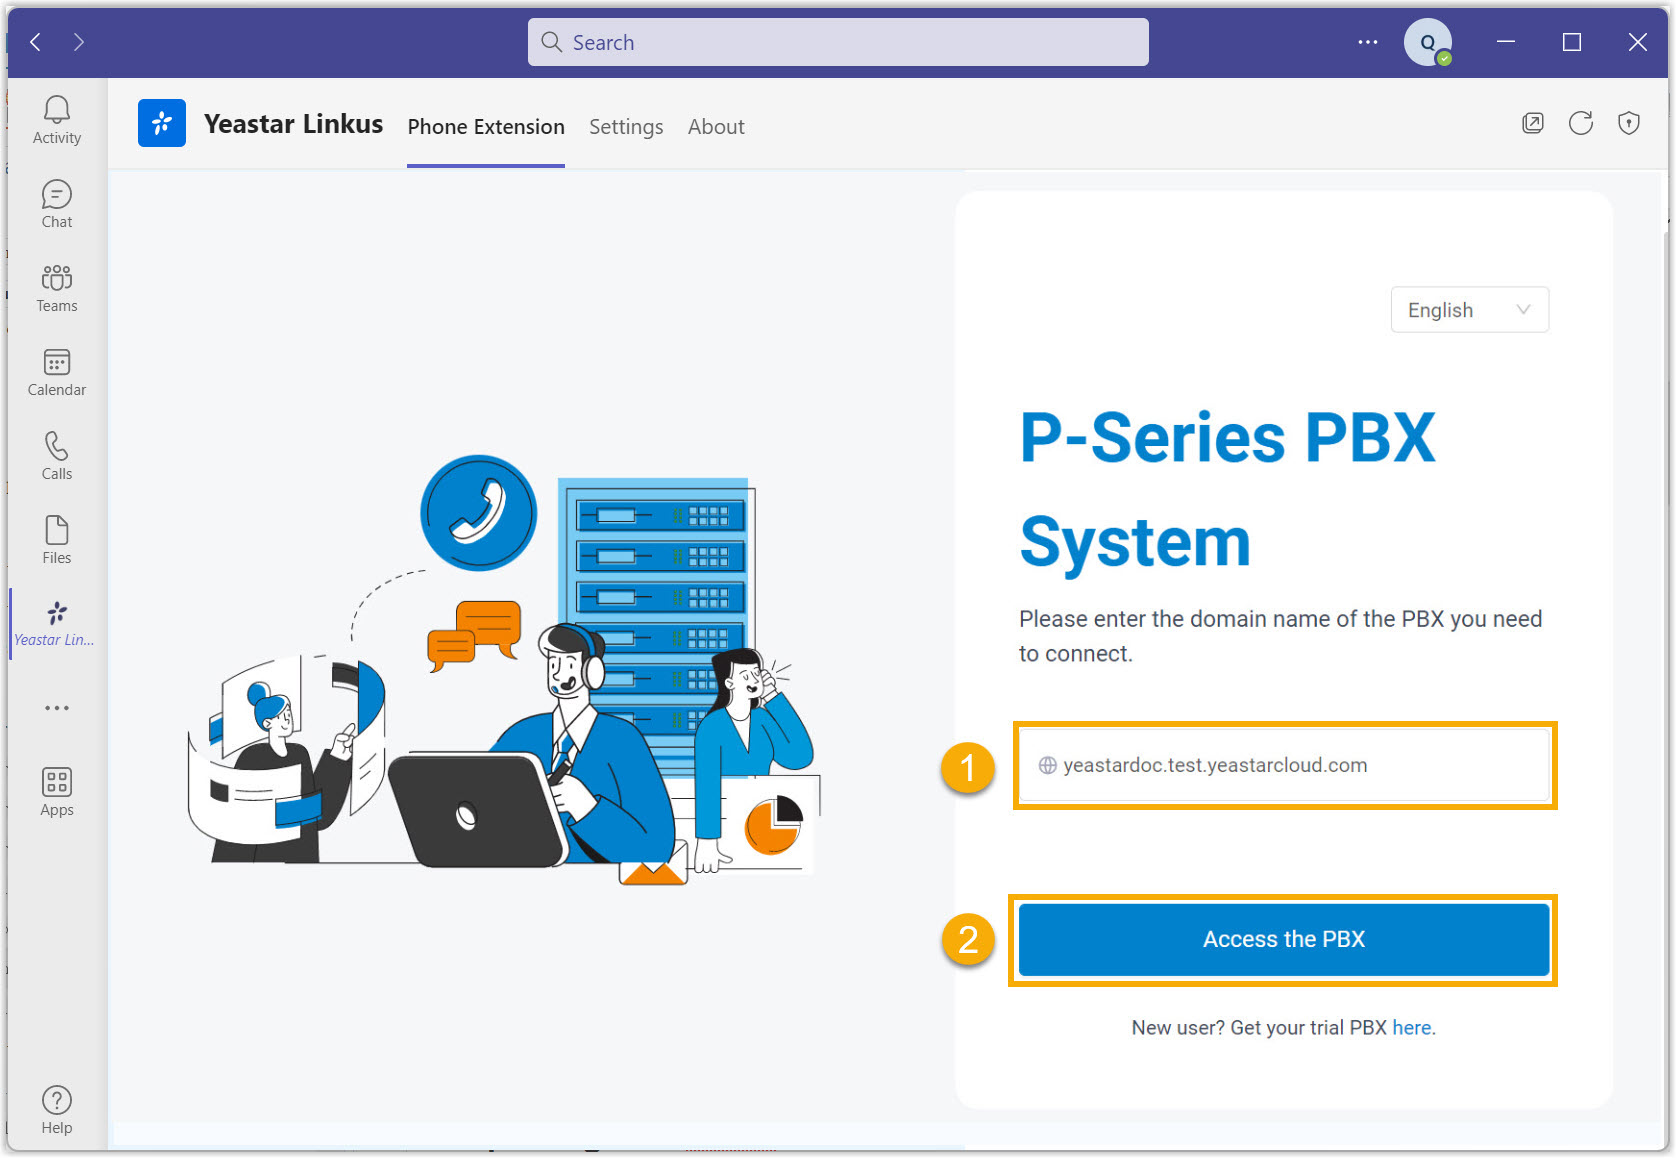
In the Phone Extension tab, enter the domain name of your Linkus Web Client, then click Access the PBX.
You will be directed to the login page.
Step 3: Log In To Linkus Web Client With Teams
You can log in using either your Yeastar extension account or your Microsoft account.
a. Log in with your Yeastar extension account
- On the login page, enter your extension account credentials:
- Username: The email address linked to your extension account.
- Password: The password for your extension account.
- Click the LOG IN button to access the Linkus Web Client.
2. If you have enabled two-factor authentication, you will need to enter an authentication code.
a. Enter the authentication code provided.
b. Click the LOG IN button.
3. In the pop-up window, choose whether to allow Yeastar Linkus to send you notifications for chat messages and calls.
b. Log in with your Microsoft account.
1. On the login page, click Sign in with Microsoft.
2. In the pop-up window, log in with your Microsoft account.3. In the pop-up window, choose whether to allow Yeastar Linkus to send you notifications for chat messages and calls.
Step 4: Set Up And Select The Endpoint To Make And Receive Calls
You can use the Linkus Web Client, Linkus Desktop Client, or an IP Phone as your calling endpoint by enabling CTI control for these devices. This allows you to manage calls in Teams while making and receiving them from the selected endpoint.
Scenario | Instruction |
Using Linkus Web Client as the calling endpoint | 1. In the top right corner, click |
Using Linkus Desktop Client as the calling endpoint | 1. Upgrade Linkus Desktop Client to version 1.5.4 or later. 2. Log in to the Linkus Desktop Client with your extension. |
| Using an IP Phone as the calling endpoint | 1. Use a Yealink, Fanvil, or Snom IP phone with a model and firmware version that meet the requirements specified in the Yeastar CTI Supported Devices list. 2. Register your extension on the IP phone. |
Step 5 (Optional) Pin Yeastar Linkus
Pin Yeastar Linkus to your Teams navigation bar for quick and easy access.

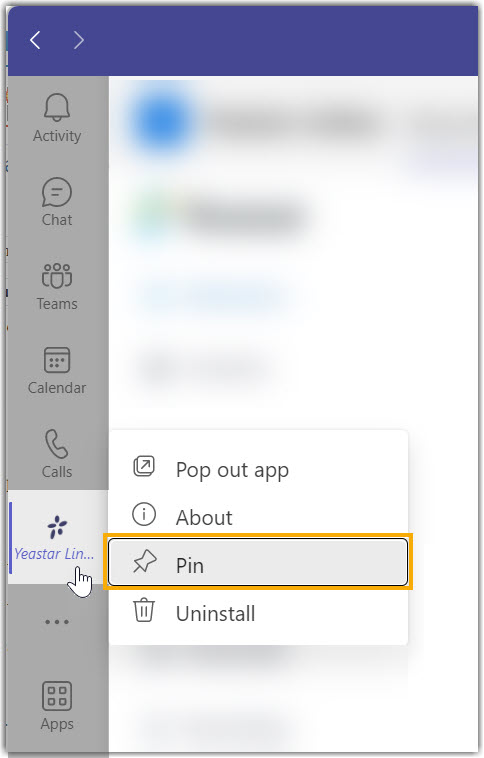
1. In the left sidebar, right-click on Yeastar Linkus.2. Click Pin in the pop-up window.
The Result
You can now make and receive internal and external calls within Microsoft Teams using the PBX.
Related Articles
Yeastar P-Series Cloud Edition PBX Wallboard: An Overview
This article outlines the features of the Yeastar P-Series Cloud Edition PBX Wallboard and the call metrics it displays. The Wallboard offers a clear and straightforward way to view real-time information related to queues. Capabilities of the Yeastar ...How To Create Call Reports On Yeastar P-Series Cloud PBX
This guide helps Yeastar P-Series PBX users create visual call reports to analyse call data easily. Log In: Access the PBX web portal and go to Reports and Recordings > Call Reports. Choose Report Type: From the Report Type dropdown menu, select the ...Yeastar P-Series Cloud Edition PBX Queue Panel: An Overview
This article provides an overview of the functionalities available on the Queue Panel and outlines the permissions for both queue managers and agents. Capabilities Of The Queue Panel The Yeastar Queue Panel features a user-friendly interface that ...How To Access And Navigate The Operator Panel On Yeastar P-Series Cloud Edition PBX
This guide is for Yealink P-Series Cloud PBX users who need to access and navigate the Operator Panel. Accessing The Operator Panel Prerequisites Ensure the Linkus Web Client is enabled. Verify that you have the necessary permissions to access the ...How To Search For And Download Call Recording Files On Yeastar P-Series Cloud PBX
This guide helps Yeastar P-Series Cloud PBX users search for and download call recordings. Search Call Recordings Log In Access the PBX web portal and go to Reports and Recordings > Recording Files. Set Search Criteria You can search recordings by ...